The WalletConnect Report is here!
Download report
Blog Home
Tutorial
|
March 21, 2023
The WalletConnect logo
WalletConnect
How to build a wallet in React Native with the Web3Wallet SDK

Ever wondered what it is like to create a mobile wallet like Rainbow or Trust Wallet? Being a wallet developer unlocks superpowers to understand how accounts, transactions and providers work.

In this tutorial, we will build a simple web3 wallet with the WalletConnect Web3Wallet SDK via React Native Expo, which empowers you with the foundations to be a web3 wallet developer.

This is written with a focus on Ethereum; however, the same principles can be transferred to Solana, Cosmos and other chains as the Web3Wallet SDK is designed to work multi-chain.

What is a web3 wallet?

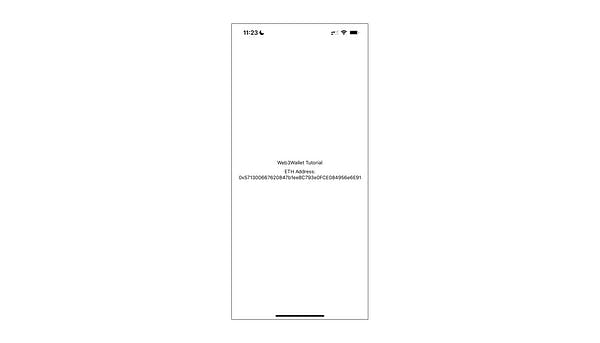
If we examine the Ethereum address of `0x1234….`, it has several properties:

  • An account address called a public key
  • A private key to authorize certain actions
  • Balance of ETH / tokens
  • Send and receive tokens (ERC20, ERC721 & more) and perform other actions via the private key
  • Other elements such as nonce, codeHash & storageHash

This is the foundation of a web3 wallet and which allows users to interact with the blockchain. More info here.

Desktop/browser <> mobile wallets

The most commonly-used desktop wallet is MetaMask. Since 2016, they have remained the most popular method for interacting with the Ethereum blockchain on the web browser.

However, there is a strong understanding that mobile devices are the primary mode of communication for people and great mobile wallets such as Rainbow, Trust and Argent have unlocked this.

WalletConnect is the decentralized web3 messaging layer and the standard for connecting blockchain wallets to dapps. You may have used WalletConnect when you scanned a QR code to connect to a dapp. In addition to this, there are several SDKs that developers can use with WalletConnect such as Web3Modal, the WalletConnect Chat API, the WalletConnect Push API and Web3Wallet, which will be used today.

What is the Web3Wallet SDK?

The Web3Wallet (W3W) SDK combines WalletConnect’s Sign API v2.0 and Auth API into one package, which allows developers to sign from both the dapp and wallet sign as well as authenticate into the application. I highly recommend going through the documentation before starting.

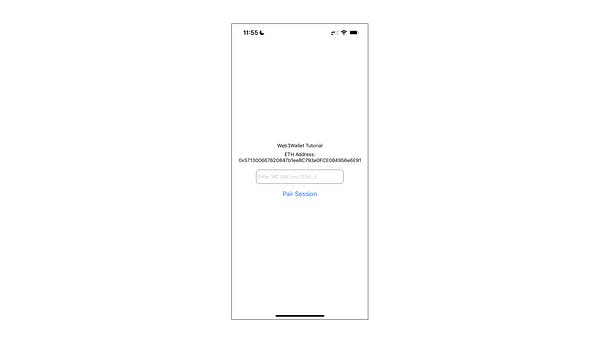
What will we be building?

Here is the example repo of what we will be creating via Expo, which is a tool to help with React Native (RN) development.

You can either start fresh from the beginning with this tutorial or follow along by reading the code.

In order to test the wallet <> dapp interaction, we will be using the WalletConnect React Demo App. Ensure you open this on another tab to use in parallel with your development process.

The tutorial process is broken down into:

  • Installation
  • Project Setup
  • W3W Setup
  • Initialization
  • Pairing
  • Approve / Rejection of the pairing session
  • Methods: Signing.
  • Disconnect

Installation

npx create-expo-app -t expo-template-blank-typescript
// When prompted with "What is your app named"
// Type: web3wallet_tutorial
cd web3wallet_tutorial
npx expo start

As per the Expo Docs.

Install the Expo Go app on your iOS or Android phone and connect to the same wireless network as your computer. On Android, use the Expo Go app to scan the QR code from your terminal to open your project. On iOS, use the built-in QR code scanner of the default iOS Camera app.

Follow the Expo instructions here for further setup.

Personally I prefer to use iOS Simulator or tunnel it with my physical device however feel free to choose Android

npm run ios

// or

npm run android

Project Setup

Let’s get started by installing the additional packages.

npm install @walletconnect/web3wallet
@walletconnect/react-native-compat
@react-native-async-storage/async-storage
react-native-get-random-values
react-native-dotenv
fast-text-encoding
@ethersproject/shims
@json-rpc-tools/utils
ethers@5.4

// or

yarn add @walletconnect/web3wallet 
@walletconnect/react-native-compat 
@react-native-async-storage/async-storage 
react-native-get-random-values 
fast-text-encoding
@ethersproject/shims
@json-rpc-tools/utils
ethers@5.4
@ethersproject/shims

Packages we are installing:

  • @walletconnect/web3wallet: Web3Wallet SDK
  • @walletconnect/react-native-compat: WalletConnect RN compatability package
  • @react-native-async-storage/async-storage: LocalStorage version for RN
  • Other: react-native-get-random-values , fast-text-encoding, @ethersproject/shims, @json-rpc-tools/utils, ethers@5.4
    @ethersproject/shims for helpers.

Initializing W3W

Get a projectID from the WalletConnect Cloud.

With this tutorial, we will be using the projectID which is shown after you create a Project. Usually we would take a .env approach but this is complicated in React Native so we will go ahead with just copy and pasting the projectID for development/tutorial purposes.

Making it possible to use the `src` folder

In App.tsx, let’s add

  • Create a src folder to make it easier for development
  • In package.json change the “main”: “node_modules/expo/AppEntry.js” to “src/screens/App.tsx”
// package.json
...
"main": "src/screens/App.tsx",
...

Also adjust App.tsx to register the root.

//App.tsx
import { registerRootComponent } from "expo";
….
// After the rendering / at bottom of the page.
registerRootComponent(App);

If this does not work, try an alternative to change the entryPoint in Expo by searching for similar StackOverFlow questions such as here.

Web3Wallet SDK

Initialization

Hopefully you have read the documentation for W3W.

Let’s create a folder structure like this.

├── src
│   ├── screens
│   │   ├── App.tsx
│   │   ├── PairingModal.tsx
│   │   └── SignModal.tsx
│   └── utils
│       ├── EIP155Lib.ts
│       ├── EIP155Requests.ts
│       ├── EIP155Wallet.ts
│       ├── Helpers.ts
│       └── WalletConnectUtils.tsx

In Screens:

  • **App.tsx: Homepage file and will have the most code
  • **PairingModal.tsx: Modal to provide information on the dapp to connect with
  • **SignModal.tsx: Modal to sign by either rejection or signing of a personal from the dApp side.

In Utils:

  • EIP155Lib.ts: Library helpers for EIP155
  • EIP155Requests.ts: Handle of the request.
  • EIP155Wallet.ts: Utils to help create an EIP155 Wallet.
  • Helpers.ts: Functions to help with wallet creation.
  • **WalletConnectUtils.tsx: Main functions for W3W

We will be focusing on the ** files as they are the most important. Please copy and paste the rest from by accessing the repo files here.

  • EIP155Lib.ts
  • EIP155Requests.ts
  • EIP155Wallet.ts
  • Helpers.ts

Let’s get started with WalletConnectUtils.tsx:

  • Once again, ensure you have the above files
  • Most of the import statements were explained when we installed the respective packages
  • web3wallet: IWeb3Wallet → Represents the type interface we use
  • core: ICore → Similar to the above
  • currentETHAddress: string → Represents a 0x1234… type of EIP155 address that is created utility functions via EIP155Wallet.ts

The three core functions we have to understand here are:

  • createWeb3Wallet(): The main function which initializes an EIP155 address (i.e. 0x1234) and the W3W core SDK via web3wallet.init() and sets its respective metadata. For those that are curious on how the wallet is created, feel free to check out the createOrRestoreEIP155Wallet function and how it works with AsyncStorage.
  • useInitialization(): A simplified hook of initialization and calling createWeb3Wallet which we will pass to App.tsx
  • web3WalletPair(): The pair function we call when we want to pair the wallet with a dapp
import "@walletconnect/react-native-compat";
import "@ethersproject/shims";

import { Core } from "@walletconnect/core";
import { ICore } from "@walletconnect/types";
import { Web3Wallet, IWeb3Wallet } from "@walletconnect/web3wallet";

export let web3wallet: IWeb3Wallet;
export let core: ICore;
export let currentETHAddress: string;

import { useState, useCallback, useEffect } from "react";
import { createOrRestoreEIP155Wallet } from "./EIP155Wallet";

async function createWeb3Wallet() {
  // Here we create / restore an EIP155 wallet
  const { eip155Addresses } = await createOrRestoreEIP155Wallet();
  currentETHAddress = eip155Addresses[0];

  // HardCoding it here for ease of tutorial
  const ENV_PROJECT_ID = "XXXX";
  const core = new Core({
    projectId: ENV_PROJECT_ID,
  });

  web3wallet = await Web3Wallet.init({
    core,
    metadata: {
      name: "Web3Wallet React Native Tutorial",
      description: "ReactNative Web3Wallet",
      url: "https://walletconnect.com/",
      icons: ["https://avatars.githubusercontent.com/u/37784886"],
    },
  });
}

// Initialize the Web3Wallet
export default function useInitialization() {
  const [initialized, setInitialized] = useState(false);

  const onInitialize = useCallback(async () => {
    try {
      await createWeb3Wallet();
      setInitialized(true);
    } catch (err: unknown) {
      console.log("Error for initializing", err);
    }
  }, []);

  useEffect(() => {
    if (!initialized) {
      onInitialize();
    }
  }, [initialized, onInitialize]);

  return initialized;
}

export async function web3WalletPair(params: { uri: string }) {
  return await web3wallet.core.pairing.pair({ uri: params.uri });
}

This has set us with the utility functions to use the W3W SDK. We will go over the App.tsx to now create the simple UI:

Adjust your App.tsx to look like the below:

  1. Add in the various imports
  2. Add in the useInitialization from WalletConnectUtils.tsx
  3. Add useEffect that we will be adjusting later
  4. Add in some UI for the Heading + ETH Address
//Add these imports
import "fast-text-encoding";
import "@walletconnect/react-native-compat";
import { registerRootComponent } from "expo";
import useInitialization, {
  currentETHAddress,
  web3wallet,
  web3WalletPair,
} from "../utils/WalletConnectUtils";

import { StatusBar } from 'expo-status-bar';
import { StyleSheet, Text, View } from 'react-native';

export default function App() {


  //Add Initialization
useInitialization();

// Add useEffect
useEffect(() => {
 // We will be adding more here...
},[currentETHAddress]);


  return (
    <View style={styles.container}>
      <View style={styles.container}>
        <Text>Web3Wallet Tutorial</Text>
        <Text style={styles.addressContent}>
          ETH Address: {currentETHAddress ? currentETHAddress : "Loading..."}
        </Text>
</View>
</View>
  );
}

//Add some styles
const styles = StyleSheet.create({
  container: {
    flex: 1,
    alignItems: "center",
    justifyContent: "center",
  },
  modalContentContainer: {
    display: "flex",
    justifyContent: "center",
    alignItems: "center",
    borderRadius: 34,
    borderWidth: 1,
    width: "100%",
    height: "40%",
    position: "absolute",
    bottom: 0,
  },
  textInputContainer: {
    height: 40,
    width: 250,
    borderColor: "gray",
    borderWidth: 1,
    borderRadius: 10,
    marginVertical: 10,
    padding: 4,
  },
  addressContent: {
    textAlign: "center",
    marginVertical: 8,
  },
});

registerRootComponent(App);

Your UI should look like this:

Pairing

Next we will continue by adding a TextInput so we can capture a WalletConnect URI (WC URI).

A WC URI represents a proxy link that allows the mobile wallet to connect to a dapp via the Web3Wallet SDK. This can be obtained from any WalletConnect integrated application. As aforementioned, we will be using this React Dapp.

The pairing function which uses our web3WalletPair function from WalletConnectUtils.tsx allows dapps and wallets to create the initial connection and share between the pair of them.

Add this into your App.tsx.

//Adjust your imports to included TextInput and Button + useState
import { Button, StyleSheet, Text, TextInput, View } from "react-native";
import { useEffect, useState } from "react";


...

// Add useState under your add function
export default function App() {
  const [currentWCURI, setCurrentWCURI] = useState("");

  //Add Initialization
  useInitialization();

//Add the pairing function from W3W
  async function pair() {
    const pairing = await web3WalletPair({ uri: currentWCURI });
    return pairing;
  }

...


...
//Add in the TextInput into your rendering
return (
    <View style={styles.container}>
      <View style={styles.container}>
        <Text>Web3Wallet Tutorial</Text>
        <Text style={styles.addressContent}>
          ETH Address: {currentETHAddress ? currentETHAddress : "Loading..."}
        </Text>

//Add InBetween
      <View>
        <TextInput
          style={styles.textInputContainer}
          onChangeText={setCurrentWCURI}
          value={currentWCURI}
          placeholder="Enter WC URI (wc:1234...)"
        />
        <Button onPress={() => pair()} title="Pair Session" />
      </View>
      </View>


    </View>
  );

}

In order to test the WC connection, we are going to add PairingModal.tsx and the associated functionality to trigger it.

Copy this over into your PairingModal.tsx

  • The PairingModalProps interface demonstrates that we will pass through the visibility of the modal, the actions to close it, data pertaining to the currentProposal to pair, accepting and rejection methods.
  • The various constants of name, url, methods, events, chains and icon have been written for ease and are a part of the currentProposal data object.
import { Button, Image, Modal, StyleSheet, Text, View } from "react-native";
import { SignClientTypes } from "@walletconnect/types";

interface PairingModalProps {
  visible: boolean;
  setModalVisible: (arg1: boolean) => void;
  currentProposal:
    | SignClientTypes.EventArguments["session_proposal"]
    | undefined;
  handleAccept: () => void;
  handleReject: () => void;
}

export default function PairingModal({
  visible,
  currentProposal,
  handleAccept,
  handleReject,
}: PairingModalProps) {
  const name = currentProposal?.params?.proposer?.metadata?.name;
  const url = currentProposal?.params?.proposer?.metadata.url;
  const methods = currentProposal?.params?.requiredNamespaces.eip155.methods;
  const events = currentProposal?.params?.requiredNamespaces.eip155.events;
  const chains = currentProposal?.params?.requiredNamespaces.eip155.chains;
  const icon = currentProposal?.params.proposer.metadata.icons[0];

  return (
    <Modal visible={visible} animationType="slide" transparent>
      <View style={styles.container}>
        <View style={styles.modalContentContainer}>
          <Image
            style={styles.dappLogo}
            source={{
              uri: icon,
            }}
          />
          <Text>{name}</Text>
          <Text>{url}</Text>

          <Text>Chains: {chains}</Text>

          <View style={styles.marginVertical8}>
            <Text style={styles.subHeading}>Methods:</Text>
            {methods?.map((method) => (
              <Text style={styles.centerText} key={method}>
                {method}
              </Text>
            ))}
          </View>

          <View style={styles.marginVertical8}>
            <Text style={styles.subHeading}>Events:</Text>
            {events?.map((events) => (
              <Text style={styles.centerText}>{events}</Text>
            ))}
          </View>

          <View style={styles.flexRow}>
            <Button onPress={() => handleReject()} title="Cancel" />
            <Button onPress={() => handleAccept()} title="Accept" />
          </View>
        </View>
      </View>
    </Modal>
  );
}

const styles = StyleSheet.create({
  container: {
    flex: 1,
    alignItems: "center",
    justifyContent: "center",
  },
  modalContentContainer: {
    display: "flex",
    justifyContent: "center",
    alignItems: "center",
    borderRadius: 34,
    borderWidth: 1,
    width: "100%",
    height: "50%",
    position: "absolute",
    backgroundColor: "white",
    bottom: 0,
  },
  dappLogo: {
    width: 50,
    height: 50,
    borderRadius: 8,
    marginVertical: 4,
  },
  flexRow: {
    display: "flex",
    flexDirection: "row",
  },
  marginVertical8: {
    marginVertical: 8,
    textAlign: "center",
  },
  subHeading: {
    textAlign: "center",
    fontWeight: "600",
  },
  centerText: {
    textAlign: "center",
  },
});

We will need to add to our App.tsx to allow the PairingModal to appear.

  • Add in extra imports
  • Add in several useStates to help with modal state and data capture
  • Various important functions to allow the PairingModal to work
  • onSessionProposal: Callback to the event listener and to trigger modal state changes.
  • handleAccept: this function is quite verbose but it checks for the requiredNameSpaces across the various chains selected, maps it and passes this into the web3Wallet.approveSession function. This allows the wallet to accept and approve of the session.
  • handleReject: a simple rejection call to the session.
  • useEffect adjustment to listen to onSessionProposal changes.
// Add the following Imports
...
import useInitialization, {
  currentETHAddress,
  web3wallet,
  web3WalletPair,
} from "../utils/WalletConnectUtils";
import PairingModal from "./PairingModal";
import { SignClientTypes, SessionTypes } from "@walletconnect/types";
import { getSdkError } from "@walletconnect/utils";

...

// Add following useStates
export default function App() {
  const [currentWCURI, setCurrentWCURI] = useState("");
  
  const [modalVisible, setModalVisible] = useState(false);
  const [currentProposal, setCurrentProposal] = useState();
  const [successfulSession, setSuccessfulSession] = useState(false);

...
// After the pair() function, add these functions: onSessionProposal / handleAccept / handleReject

  const onSessionProposal = useCallback(
    (proposal: SignClientTypes.EventArguments["session_proposal"]) => {
      setModalVisible(true);
      setCurrentProposal(proposal);
    },
    []
  );

 async function handleAccept() {
    const { id, params } = currentProposal;
    const { requiredNamespaces, relays } = params;

    if (currentProposal) {
      const namespaces: SessionTypes.Namespaces = {};
      Object.keys(requiredNamespaces).forEach((key) => {
        const accounts: string[] = [];
        requiredNamespaces[key].chains.map((chain) => {
          [currentETHAddress].map((acc) => accounts.push(`${chain}:${acc}`));
        });

        namespaces[key] = {
          accounts,
          methods: requiredNamespaces[key].methods,
          events: requiredNamespaces[key].events,
        };
      });

      await web3wallet.approveSession({
        id,
        relayProtocol: relays[0].protocol,
        namespaces,
      });

      setModalVisible(false);
      setCurrentWCURI("");
      setCurrentProposal(undefined);
      setSuccessfulSession(true);
    }
  }

  async function handleReject() {
    const { id } = currentProposal;

    if (currentProposal) {
      await web3wallet.rejectSession({
        id,
        reason: getSdkError("USER_REJECTED_METHODS"),
      });

      setModalVisible(false);
      setCurrentWCURI("");
      setCurrentProposal(undefined);
    }
  }

// Adjust your UseEffect

  useEffect(() => {
    web3wallet?.on("session_proposal", onSessionProposal);
  }, [
    pair,
    handleAccept,
    handleReject,
    currentETHAddress,
    onSessionProposal,
    successfulSession,
  ]);

...
// In your rendering, after your TextInput View, add in the PairingModal

...
</View>

      <PairingModal
        handleAccept={handleAccept}
        handleReject={handleReject}
        visible={modalVisible}
        setModalVisible={setModalVisible}
        currentProposal={currentProposal}
      />

</View>
 );
}

Test this side by side with the dapp and the following should result and connect like this video.

Awesome, a pat on the back for getting the pairing to work 👏

Signing

Now let’s add the SigningModal.tsx and adjust our App.tsx.

Copy this over into SigningModal.tsx:

  • The Interface is similar to the PairingModal however our data is related to requestSession and requestEvent
  • The onApprove and onReject functions interact with the web3wallet.respondtoSession() function
  • We use the approveEIP155Request and rejectEIP155Request functions from our utils to help us talk to the RPC
import { web3wallet } from "../utils/WalletConnectUtils";

interface SignModalProps {
  visible: boolean;
  setModalVisible: (arg1: boolean) => void;
  requestSession: any;
  requestEvent: SignClientTypes.EventArguments["session_request"] | undefined;
}

export default function SignModal({
  visible,
  setModalVisible,
  requestEvent,
  requestSession,
}: SignModalProps) {
  // CurrentProposal values

  if (!requestEvent || !requestSession) return null;

  const chainID = requestEvent?.params?.chainId?.toUpperCase();
  const method = requestEvent?.params?.request?.method;
  const message = getSignParamsMessage(requestEvent?.params?.request?.params);

  const requestName = requestSession?.peer?.metadata?.name;
  const requestIcon = requestSession?.peer?.metadata?.icons[0];
  const requestURL = requestSession?.peer?.metadata?.url;

  const { topic } = requestEvent;

  async function onApprove() {
    if (requestEvent) {
      const response = await approveEIP155Request(requestEvent);
      await web3wallet.respondSessionRequest({
        topic,
        response,
      });
      setModalVisible(false);
    }
  }

  async function onReject() {
    if (requestEvent) {
      const response = rejectEIP155Request(requestEvent);
      await web3wallet.respondSessionRequest({
        topic,
        response,
      });
      setModalVisible(false);
    }
  }

  return (
    <Modal visible={visible} animationType="slide" transparent>
      <View style={styles.container}>
        <View style={styles.modalContentContainer}>
          <Image
            style={styles.dappLogo}
            source={{
              uri: requestIcon,
            }}
          />

          <Text>{requestName}</Text>
          <Text>{requestURL}</Text>

          <Text>{message}</Text>

          <Text>Chains: {chainID}</Text>

          <View style={styles.marginVertical8}>
            <Text style={styles.subHeading}>Method:</Text>
            <Text>{method}</Text>
          </View>

          <View style={{ display: "flex", flexDirection: "row" }}>
            <Button onPress={() => onReject()} title="Cancel" />
            <Button onPress={() => onApprove()} title="Accept" />
          </View>
        </View>
      </View>
    </Modal>
  );
}

const styles = StyleSheet.create({
  container: {
    flex: 1,
    alignItems: "center",
    justifyContent: "center",
  },
  modalContentContainer: {
    display: "flex",
    justifyContent: "center",
    alignItems: "center",
    borderRadius: 34,
    borderWidth: 1,
    width: "100%",
    height: "50%",
    position: "absolute",
    backgroundColor: "white",
    bottom: 0,
  },
  dappLogo: {
    width: 50,
    height: 50,
    borderRadius: 8,
    marginVertical: 4,
  },
  marginVertical8: {
    marginVertical: 8,
  },
  subHeading: {
    textAlign: "center",
    fontWeight: "600",
  },
});

For App.tsx, adjust the following:

  • Add requestSession and requestEventData useStates so we can use it in the SignModal
  • Add the onSessionRequest listener to respond to the session_request event
// Add the following imports
...
import { EIP155_SIGNING_METHODS } from "../utils/EIP155Lib";
import SignModal from "./SigningModal";
...

// Add the following useStates
...
  const [requestSession, setRequestSession] = useState();
  const [requestEventData, setRequestEventData] = useState();
  const [signModalVisible, setSignModalVisible] = useState(false);


...
// Add the following Callback listener after handleReject()
  const onSessionRequest = useCallback(
    async (requestEvent: SignClientTypes.EventArguments["session_request"]) => {
      const { topic, params } = requestEvent;
      const { request } = params;
      const requestSessionData =
        web3wallet.engine.signClient.session.get(topic);

      switch (request.method) {
        case EIP155_SIGNING_METHODS.ETH_SIGN:
        case EIP155_SIGNING_METHODS.PERSONAL_SIGN:
          setRequestSession(requestSessionData);
          setRequestEventData(requestEvent);
          setSignModalVisible(true);
          return;
      }
    },
    []
  );


// Adjust your useEffect

  useEffect(() => {
    web3wallet?.on("session_proposal", onSessionProposal);
    web3wallet?.on("session_request", onSessionRequest);
  }, [
    pair,
    handleAccept,
    handleReject,
    currentETHAddress,
    onSessionRequest,
    onSessionProposal,
    successfulSession,
  ]);

// In your rendering, add SignModal after PairingModal
...
 <SignModal
        visible={signModalVisible}
        setModalVisible={setSignModalVisible}
        requestEvent={requestEventData}
        requestSession={requestSession}
      />
...

The following should result in this:

The Final Part: Disconnecting

We are nearly there! The final step is to disconnect from the dApp by handling a disconnect function.

Let’s edit the App.tsx:

  • disconnect(): we use the activeSessions with this respective wallet and then pass the topic to the web3wallet.disconnectSession to finalize this action
  • For the UI we added some ternary (which can be refactored) to show the different states of the wallet.
...
// Add this after handleAccept()

async function disconnect() {
    const activeSessions = await web3wallet.getActiveSessions();
    const topic = Object.values(activeSessions)[0].topic;

    if (activeSessions) {
      await web3wallet.disconnectSession({
        topic,
        reason: getSdkError("USER_DISCONNECTED"),
      });
    }
    setSuccessfulSession(false);
  }


// In the rendering let's adjust the part after the ETHAddress text to be a ternary


...

{!successfulSession ? (
          <View>
            <TextInput
              style={styles.textInputContainer}
              onChangeText={setCurrentWCURI}
              value={currentWCURI}
              placeholder="Enter WC URI (wc:1234...)"
            />
            <Button onPress={() => pair()} title="Pair Session" />
          </View>
        ) : (
          <Button onPress={() => disconnect()} title="Disconnect" />
        )}

...

Finished!!! 🙏🎉

You have just completed the whole flow of creating a mobile wallet from scratch. It is not a simple feat. You went through the process of creating an Expo project, installing all the dependencies, adding simple UI and working with the Web3Wallet SDK.

Feel free to submit PR’s to the Github Repo with any questions or concerns. We are happy to help anytime.

Recommended Articles
More articles
alt=""

Build what's next.
Build with WalletConnect.

Get started
© 2024 WalletConnect, Inc.